Red Velvet Cake Cheesecakes
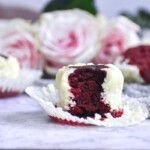
The perfect Red Velvet Cake topped with the BEST Cheesecake gives you a stunning dessert that’s sure to wow anyone.
- Prep Time: 25 Minutes
- Cook Time: 18 Minutes
- Total Time: 43 Minutes
- Yield: 24 1x
- Category: Desserts
Ingredients
Red Velvet Cake Layer
3/4 cup Flour
1/2 cup Sugar
1 1/2 TBSP Cocoa Powder
3 TBSP Butter, softened
6 tbsp Milk
1 Egg
1/4 tsp Red Food Dye
3/4 tsp Baking Soda
2 TBSP Vinegar
Cheesecake Layer
1 lb Cream Cheese
1/2 cup Sugar
7 oz Sour Cream
1 tsp Vanilla
2 Eggs
Instructions
Preheat the oven to 325 F and boil a kettle of water.
Begin by making the cheesecake layer. Cream the softened cream and sugar until creamy. You don’t want any lumps.
Add the sour cream, cream again, and then scrape the bowl. Make sure there are no lumps.
Add the vanilla and eggs Beat again. Set aside.
Now, let’s make the Red Velvet Cake. Mix the flour, sugar, and cocoa. Add the softened butter and beat on low speed with a paddle attachment. You’ll get small pea-like crumbles.
Mix 1 tbsp of the vinegar into the milk. Add the food dye and vanilla.
Add the milk mixture to the flour and butter mixture.
While beating, add the egg. Beat until smooth.
Mix the remaining vinegar and baking soda together. As soon as they bubble add to the batter. Mix well.
Prepare your muffin tin with cupcake liners.
Using a small cookie scoop (1 tbsp) add the red velvet cake batter to 24 liners. It’ll seem like a little, but it rises. Wet your finger and smooth out the batter so it’s like a crust on the bottom.
Using a medium cookie scoop (1 1/2 tbsp) add the cheesecake batter on top of the red velvet cake.
Place the boiling water in a pan on the bottom of the oven. Place the cheesecake pan above it and bake for 15-18 minutes. The cheesecake sets as it cools. The red velvet layer will most likely break through the cheesecake as it rises. Check the cake layer with a toothpick. It should not take more than 18 minutes. Cool completely and then refrigerate for at least one hour before serving. Enjoy!
Find it online: https://catastrophiccook.com/red-velvet-cake-cheesecakes/