
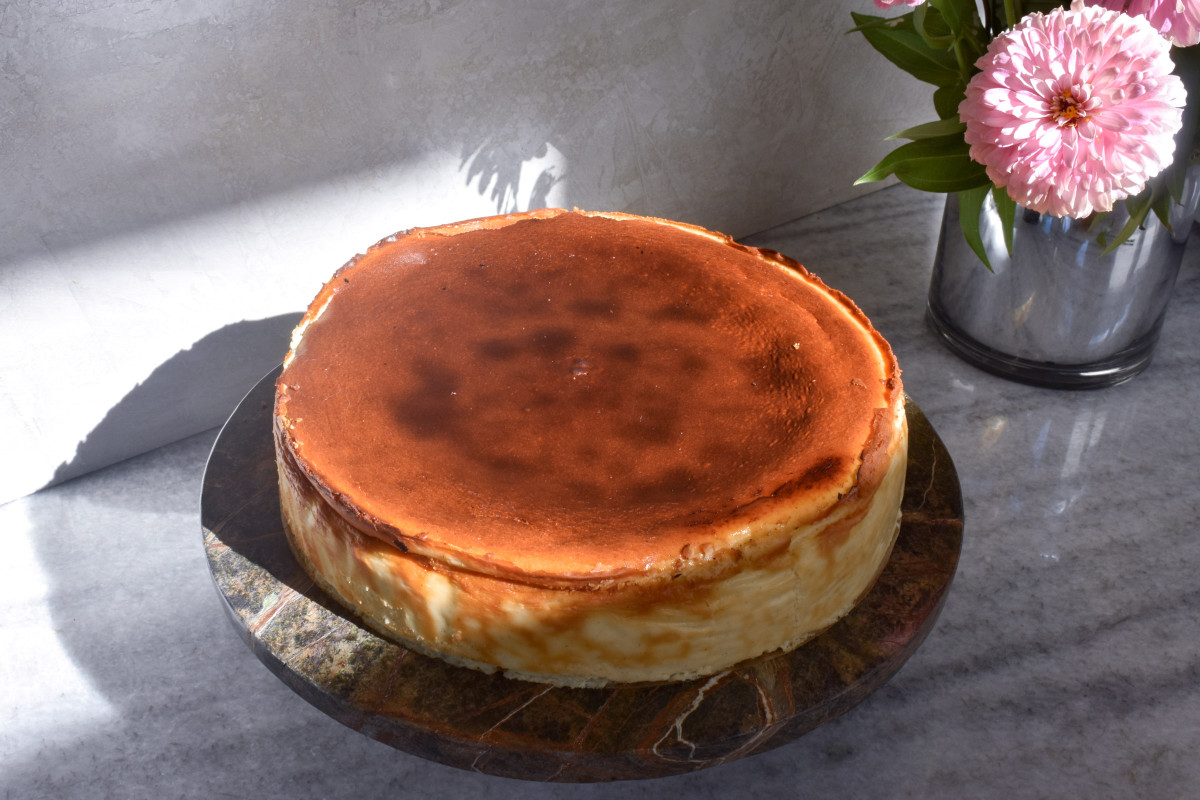
This Basque cheesecake, also known as San Sebastian cheesecake or a Burnt Basque Cheesecake, has a deeply caramelized top, a soft and creamy center, and a rich chocolate sauce poured over every slice. It may look dramatic, but I’m going to walk you through every detail—from the exact texture of the batter to the visual signs that tell you when it’s perfectly baked—because I never want you guessing your way through a recipe. My goal is always to set you up for success so your cheesecake turns out just as incredible in your kitchen as it did in mine.
Basque cheesecake originated in the coastal city of San Sebastián in Spain, where its signature deeply caramelized top and creamy, custard-like center made it famous. In recent years, it has exploded in popularity around the world—especially in Türkiye, where you’ll find San Sebastian cheesecake featured in cafés and dessert shops, often served with a generous drizzle of warm chocolate sauce. For many travelers, it’s become one of those desserts you simply have to try. The best part? You don’t need a plane ticket to experience it. This homemade version brings that same rich, café-style dessert right into your own kitchen, and unlike a traditional cheesecake, it’s surprisingly forgiving. There’s no crust to fuss with, no water bath to prepare, and its beautifully rustic appearance means cracks and a dramatic rise and fall are all part of its charm.
Why You’ll Love This Basque Cheesecake
- Perfectly creamy every time. The center is rich, silky, and custardy while the edges bake up beautifully caramelized for the signature Basque cheesecake texture.
- No crust or water bath required. Unlike a traditional cheesecake, there’s no graham cracker crust to make and no water bath to fuss with, making this recipe much simpler from start to finish.
- Easy enough for beginners. I’ll walk you through every step, including exactly what the batter should look like and the visual cues that tell you when it’s perfectly baked.
- Rich chocolate sauce takes it over the top. While this cheesecake is incredible on its own, a warm, silky chocolate sauce makes it feel just like the café-style versions served in Türkiye.
- Beautifully imperfect. Cracks, wrinkles, and a slightly sunken center aren’t flaws—they’re exactly what make an authentic Basque cheesecake so charming.
- Perfect for making ahead. The flavor only gets better after chilling, making it an excellent dessert for holidays, dinner parties, or any special occasion.
Why These Ingredients Work
This Basque cheesecake comes together with just a handful of simple ingredients, but each one plays an important role in creating its signature creamy center and beautifully caramelized top.
Cream Cheese
Use full-fat block cream cheese, softened to room temperature. I use 36 ounces of cream cheese instead of the more common 32 ounces because this cheesecake doesn’t have a crust. That extra block gives it more height and creates thick, bakery-style slices while still keeping the center irresistibly creamy.
Granulated Sugar
Sugar sweetens the cheesecake while helping the top caramelize into the deep golden-brown color Basque cheesecake is known for. I found 1¼ cups to be the perfect balance—sweet enough to complement the rich cream cheese without overpowering it, especially when served with chocolate sauce.
Eggs
Use room-temperature eggs for the smoothest batter. Before adding them, lightly whisk the eggs together. This simple step helps them incorporate quickly and evenly, so you don’t have to overmix the batter trying to break up whole eggs. The result is a smoother, creamier cheesecake with the perfect custard-like texture.
Heavy Cream
Heavy cream is what gives this cheesecake its silky, melt-in-your-mouth consistency. Don’t substitute milk or half-and-half, as they won’t provide the same richness. This recipe uses 1¼ cups for an ultra-creamy center inspired by the café-style cheesecakes served in Türkiye.
Cornstarch
Instead of flour, I use a small amount of cornstarch to gently stabilize the cheesecake while keeping it exceptionally smooth and creamy. It gives the cheesecake just enough structure to slice beautifully without taking away from its delicate texture. This also makes it a gluten free Basque Cheesecake!
Vanilla Bean Paste
I love using vanilla bean paste instead of vanilla extract because it adds a deeper, richer vanilla flavor along with beautiful flecks of real vanilla bean throughout the cheesecake. It gives the finished dessert a bakery-quality look and taste that pairs perfectly with the caramelized top.
Salt
Don’t skip the salt. Just a small amount balances the sweetness and enhances every flavor in the cheesecake, making each bite taste richer and more complex.
Tips & Tricks for the Perfect Basque Cheesecake
Start with Room-Temperature Ingredients
Room-temperature cream cheese, eggs, and heavy cream blend together much more easily, creating a silky-smooth batter without lumps. Taking the time to let your ingredients warm up is one of the easiest ways to ensure a creamy cheesecake.
Line the Pan for Cleaner Slices
Traditional Basque cheesecakes are often baked with crinkled parchment that creates rustic, ragged edges. I prefer a cleaner, more polished look, so I neatly line my pan with parchment. You’ll still get the signature caramelized top while creating smooth, bakery-style sides.
Wrap the Pan with Foil
Although this cheesecake doesn’t require a water bath, I wrap the outside of my springform pan with foil. It helps the cheesecake bake more evenly, giving the center time to set before the edges become overdone.
Whisk the Eggs First
Lightly whisk the eggs together before adding them to the batter. They’ll incorporate much more easily, so you won’t have to overmix trying to break up whole eggs. Less mixing means a smoother, creamier cheesecake.
Strain the Batter for the Silkiest Texture
One step I never skip is straining the batter through a fine-mesh sieve before pouring it into the pan. Even if your batter looks smooth, straining catches any tiny lumps or bits of unmixed ingredients that could affect the final texture. It takes less than a minute and makes a noticeable difference, giving you an ultra-smooth, creamy cheesecake that’s well worth the extra step.
Resist the Urge to Overbake
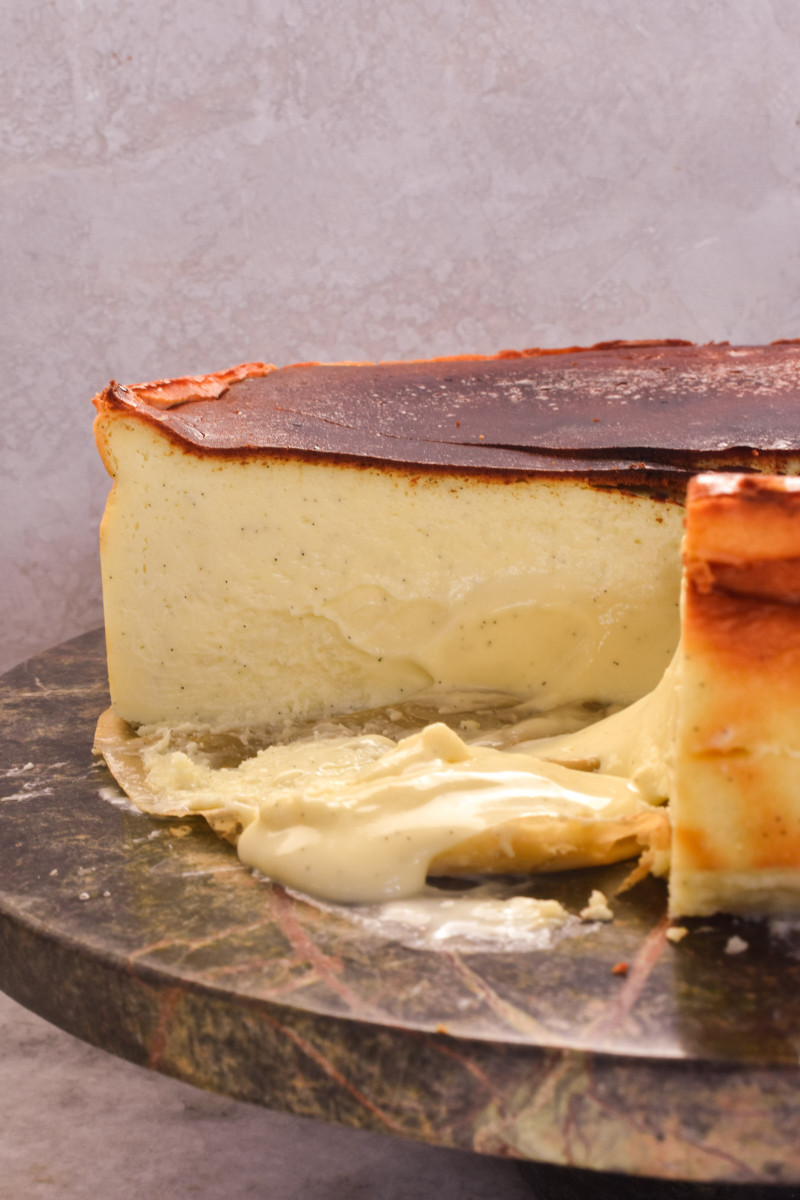
The biggest mistake people make is waiting until the center looks completely set. Basque cheesecake should still have a noticeable jiggle in the center when you remove it from the oven. It will continue cooking from the residual heat as it cools, creating that signature creamy, custard-like texture.
Check the Internal Temperature
One of my favorite ways to know when a Basque cheesecake is done is by using an instant-read thermometer. I typically bake mine until the center reaches 148–165°F, depending on the texture I’m after.
- 148–155°F: The center will be softer, creamier, and almost pudding-like after chilling.
- 156–160°F: My favorite range for the perfect balance of a fully set cheesecake with an irresistibly creamy center.
- 165°F: If you prefer a firmer cheesecake or simply feel more comfortable baking it to a higher internal temperature (especially if making for someone immune-compromised or pregnant) , continue baking until the center reaches 165°F.
No matter which temperature you choose, look for the same visual cues: a deeply caramelized top, set edges, and a center that still has a slight jiggle when the cheesecake comes out of the oven.
Trust the Caramelized Top
That deep mahogany color isn’t burnt—it’s exactly what you’re looking for. The caramelized top develops a rich, bittersweet flavor that perfectly balances the creamy cheesecake beneath it.
The Top Is the Star
One of my favorite things about Basque cheesecake is that all of the caramelization happens on top. The sides stay soft and creamy while the top develops a flavor similar to crème brûlée, making every bite rich, balanced, and incredibly satisfying.
Let It Cool Completely
The cheesecake will rise dramatically in the oven before settling as it cools—that’s completely normal. For the best texture and cleanest slices, let it cool to room temperature before chilling it for at least six hours or overnight. The flavor and texture only get better as it rests. This is not one of the cheesecakes you want to rush cooling. Because it sets soft and custardy it needs to cool really well. While some of my other cheesecakes you can rush cooling, this is not one of them.
PrintBasque Cheesecake with Chocolate Sauce
This Basque Cheesecake (also known as San Sebastian Cheesecake) has a beautifully burnt caramelized top, an ultra-creamy custard-like center, and a rich chocolate sauce poured over every slice. Made without a crust or water bath, this Turkish café-inspired dessert is both elegant and surprisingly easy to make at home.
Ingredients
CHEESECAKE
36 oz Cream Cheese, Softened
1 1/4 Cup Sugar
1/4 Cup Cornstarch
1/4 tsp Salt
1 tbsp Vanilla Bean Paste
1 1/4 Cup Heavy Cream
6 Eggs
CHOCOLATE SAUCE
1/4 Cup Heavy Cream
3/4 Cup Whole Milk
2 tbsp Sweetened Condensed Milk
3 oz Dark Chocolate
Instructions
Soften the cream cheese by placing the unopened foil packages in a bowl of hot water. I like to do this with all five blocks so they stay sealed while softening, even though you’ll only use 4½ blocks (36 ounces) for the cheesecake.
Prepare a 9-inch springform pan by lightly buttering it, then lining both the bottom and sides with parchment paper. I prefer to neatly line the pan for smooth, bakery-style sides, but if you like the more traditional rustic look, simply press one large sheet of parchment into the pan instead. Wrap the outside of the pan with two layers of heavy-duty foil and set aside.
Once the cream cheese is softened, place it in the bowl of a stand mixer along with the sugar, cornstarch, salt, and vanilla bean paste. Beat on medium-low speed until completely smooth and creamy, stopping several times to scrape down both the bowl and paddle. Take your time here—we’re looking for a perfectly smooth batter with no lumps.
Meanwhile, lightly whisk the eggs together. This helps them incorporate quickly and evenly into the batter, allowing you to mix less and avoid adding unnecessary air.
With the mixer running on low speed, slowly drizzle in the whisked eggs, followed by the heavy cream. You can alternate between the two or add them together in a slow stream. Mix just until everything is fully incorporated.
Pour the batter through a fine-mesh sieve into your prepared pan. This extra step catches any tiny lumps and creates an incredibly silky, smooth cheesecake.
Bake at 465°F for 50–60 minutes, checking for doneness around the 50-minute mark. The top should be deeply caramelized and dark brown, while the center should still have a noticeable jiggle. For the most consistent results, use an instant-read thermometer. I personally love the texture when the center reaches 158°F, but anywhere between 148°F and 165°F works well. The lower end of the range will give you a softer, more custard-like center, while the higher end will produce a slightly firmer cheesecake.
Remove the cheesecake from the oven and let it cool completely at room temperature. Once cooled, refrigerate for at least 6–8 hours, but preferably overnight. Don’t rush this step—the cheesecake continues to set as it chills, and that resting time is what creates its rich, creamy, custard-like texture.
When you’re ready to serve, make the chocolate sauce. Combine the heavy cream and milk in a small saucepan and heat until it just begins to simmer. Remove from the heat, add the chocolate, and whisk until smooth and glossy. I typically prefer milk chocolate, but I recommend using dark chocolate here. The heavy cream and milk mellow its intensity, creating a perfectly balanced sauce that complements the rich cheesecake.
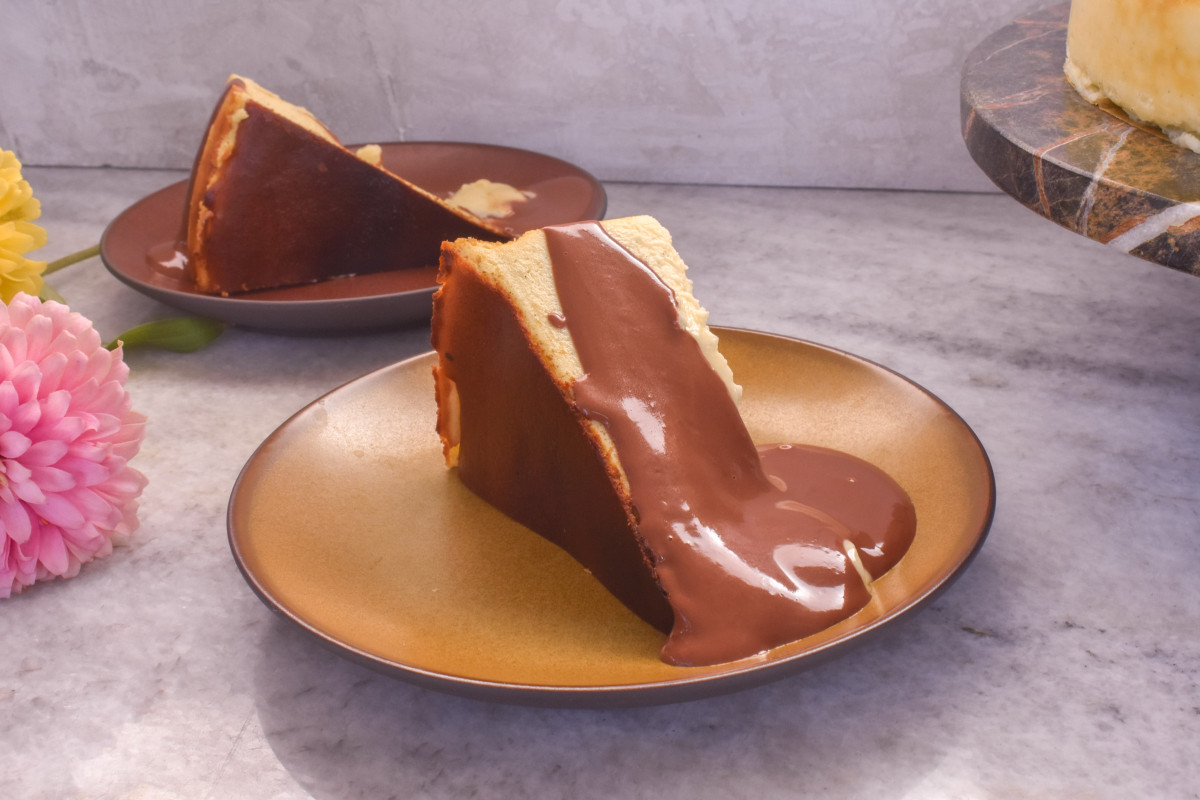
For the cleanest slices, dip a sharp knife in hot water and wipe it clean between each cut. Serve each slice on its side and finish with a generous pour of warm chocolate sauce. Enjoy!
Storage
Store your Basque cheesecake covered in the refrigerator for up to 5 days. The texture actually improves after the first day, making this an excellent make-ahead dessert. Keep the chocolate sauce in a separate airtight container in the refrigerator for up to 1 week. Reheat it gently in the microwave or over low heat on the stovetop until smooth before serving.
Freezing
Basque cheesecake freezes beautifully! Once the cheesecake has completely chilled, wrap the whole cheesecake or individual slices tightly in plastic wrap, followed by a layer of aluminum foil. Freeze for up to 2 months.
When you’re ready to enjoy it, thaw the cheesecake overnight in the refrigerator. I recommend making the chocolate sauce fresh, but if you’ve already frozen it, thaw it in the refrigerator and gently reheat until smooth before serving.
Frequently Asked Questions
Why did my Basque cheesecake crack?
A few cracks are completely normal and part of the rustic charm of Basque cheesecake. Unlike traditional cheesecakes, this dessert is meant to puff dramatically in the oven before settling as it cools. Large cracks are often caused by overbaking or incorporating too much air into the batter.
Why is the top so dark?
The deeply caramelized top is the signature characteristic of an authentic Basque cheesecake. Baking at a high temperature creates the rich caramelized flavor while keeping the center creamy and custard-like. Don’t be afraid of the dark color—that’s exactly what you want.
Does Basque cheesecake need a water bath?
No! One of the best things about Basque cheesecake is that it bakes without a water bath. The high oven temperature creates the signature caramelized top, while the creamy center develops naturally.
Why do you strain the batter?
Straining the batter removes any tiny lumps of cream cheese, egg, or cornstarch, resulting in an exceptionally smooth and silky cheesecake. It only takes a minute but makes a noticeable difference in the final texture.
How do I know when my Basque cheesecake is done?
Look for three signs: a deeply caramelized top, set edges with a slight jiggle in the center, and an internal temperature between 148°F and 165°F. For a softer, more custard-like center, pull it closer to 148°F. For a firmer cheesecake, bake it closer to 165°F.
Why is my cheesecake still jiggly?
A slight jiggle in the center is exactly what you want. The cheesecake will continue to set as it cools and finishes setting during its time in the refrigerator. If the center doesn’t move at all when you gently shake the pan, it’s likely overbaked.
Can I make Basque cheesecake ahead of time?
Absolutely! In fact, I recommend it. Basque cheesecake tastes even better after chilling overnight because the texture becomes creamier and the flavors have time to fully develop.
Can I serve Basque cheesecake without chocolate sauce?
Yes! It’s absolutely delicious on its own. The warm chocolate sauce adds a rich café-style touch inspired by the San Sebastian cheesecakes served throughout Türkiye, but the cheesecake is just as wonderful without it.
What’s the difference between Basque cheesecake and regular cheesecake?
While both are delicious, they’re very different desserts. Traditional cheesecake is baked low and slow, often in a water bath, to create a smooth, pale top and dense, creamy texture. Basque cheesecake is baked at a much higher temperature, giving it its signature deeply caramelized top and irresistibly creamy, custard-like center. It also skips the crust and the water bath, making it much simpler to prepare.
Can I make Basque cheesecake without a springform pan?
Yes, but a 9-inch springform pan is my recommendation for the best results. It makes removing the cheesecake much easier and helps maintain its beautiful shape. If you don’t have one, you can bake it in a similarly sized cake pan lined with enough parchment paper to create overhang on all sides. Once the cheesecake has completely chilled, use the parchment to carefully lift it out before slicing.
Can I use vanilla extract instead of vanilla bean paste?
Yes! Vanilla bean paste adds a richer vanilla flavor and beautiful flecks of real vanilla bean throughout the cheesecake, giving it a bakery-quality look and taste. If you don’t have vanilla bean paste, you can substitute an equal amount of pure vanilla extract. Your Basque cheesecake will still turn out rich, creamy, and delicious.
Why did my Basque cheesecake sink?
Don’t worry—this is completely normal! Basque cheesecake rises dramatically in the oven because of the high baking temperature, then settles as it cools. In fact, that slight collapse is part of its signature appearance. As long as the top is deeply caramelized, the edges are set, and the center reached your desired doneness, your cheesecake turned out exactly as it should.
Join the conversation