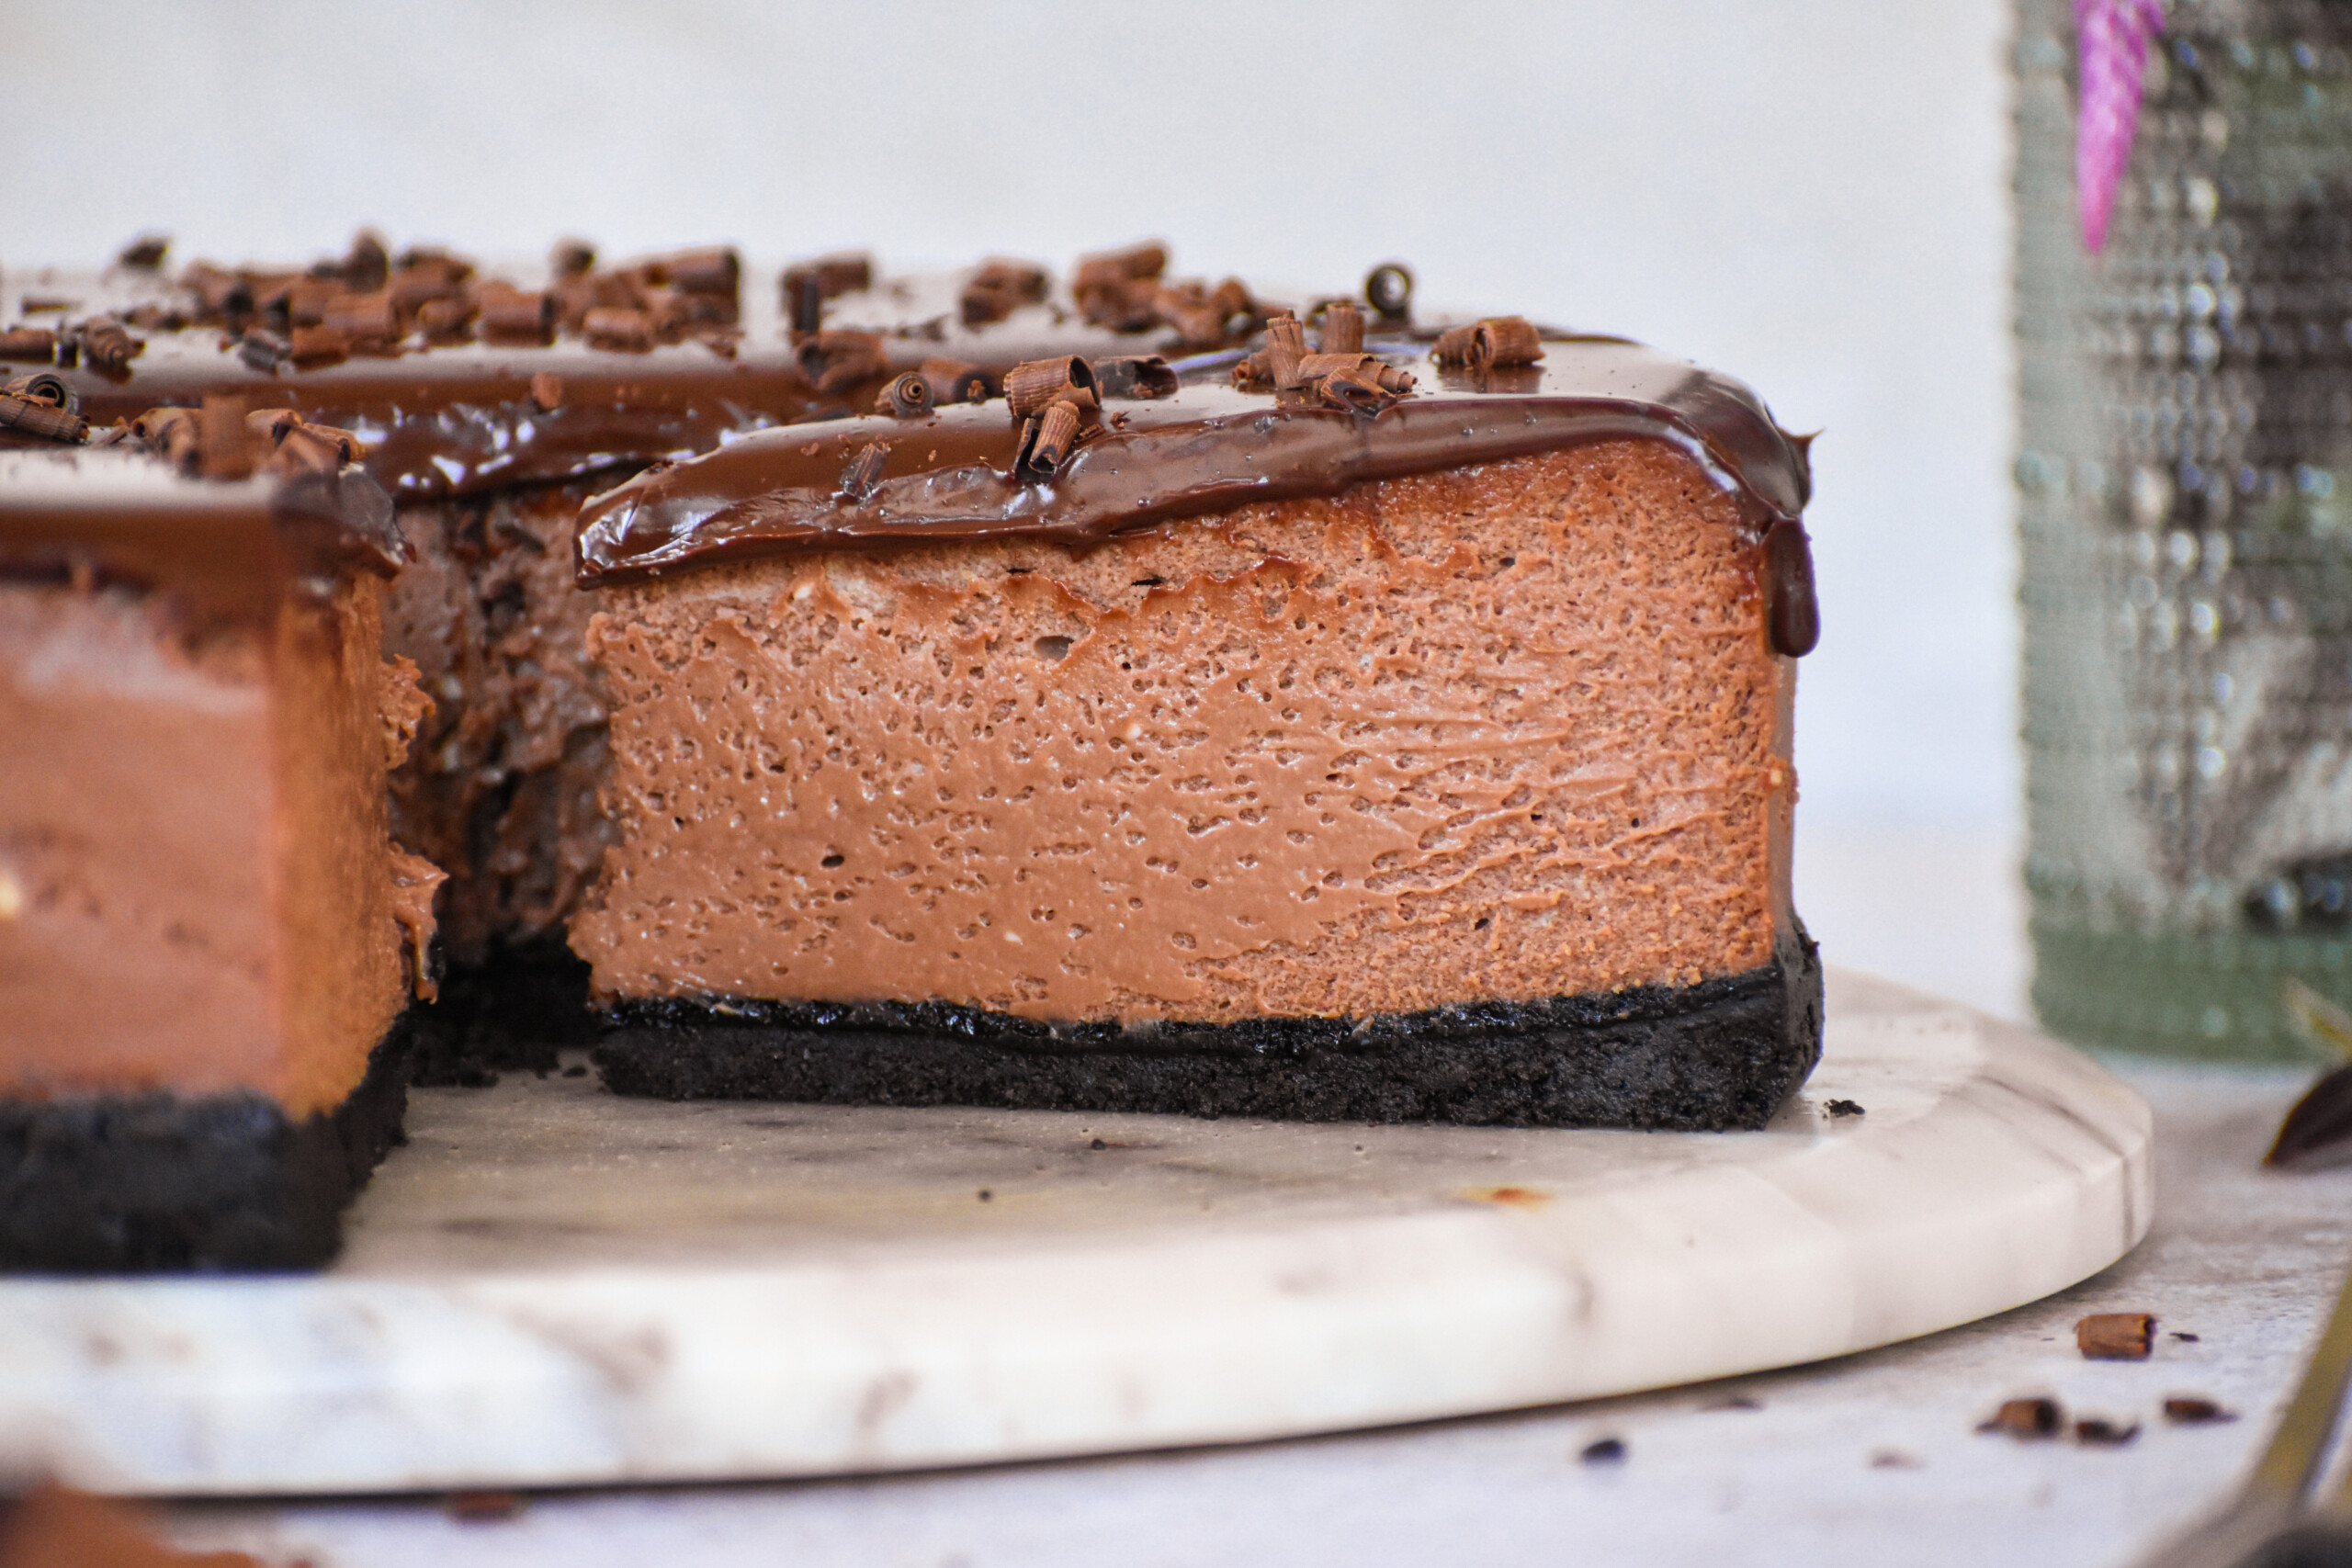
I’m a sucker for chocolate and cheesecake. But I’m also very picky about it. Take me to dinner, and you’ll find me browsing the dessert menu before I even think about my entree. And if it has chocolate in the name I’m almost always inclined to try it. And then you have cheesecake. Cheesecake is one of the few desserts that I struggle ordering out. I’ve had one too many cheesecakes that are too dense or heavy. I’ve had some that are eggy or just taste like cool whip. So when it comes to cheesecake I’m very picky about it and will almost never order it. Plus, being the cheesecake snob that I am, I have the perfect recipe for a Classic Cheesecake!
Of course every rule has its exceptions. The Cheesecake Factory has a Chocolate Tuxedo Cream Cheesecake that is phenomenal. It’s layers of cheesecake and mousse over a chocolate cake and god is it good. That was probably the inspiration for this cheesecake. I wanted to mimic the silky luxurious mousse but in just a cheesecake. I wanted it to be very approachable for anyone who wanted to make it and I wanted to eliminate the need for layering and a longer process. Because if you’ve made cheesecake you know its a slightly more tedious baking task to take on and requires a little more patience. Now does that patience pay off? My god it does.
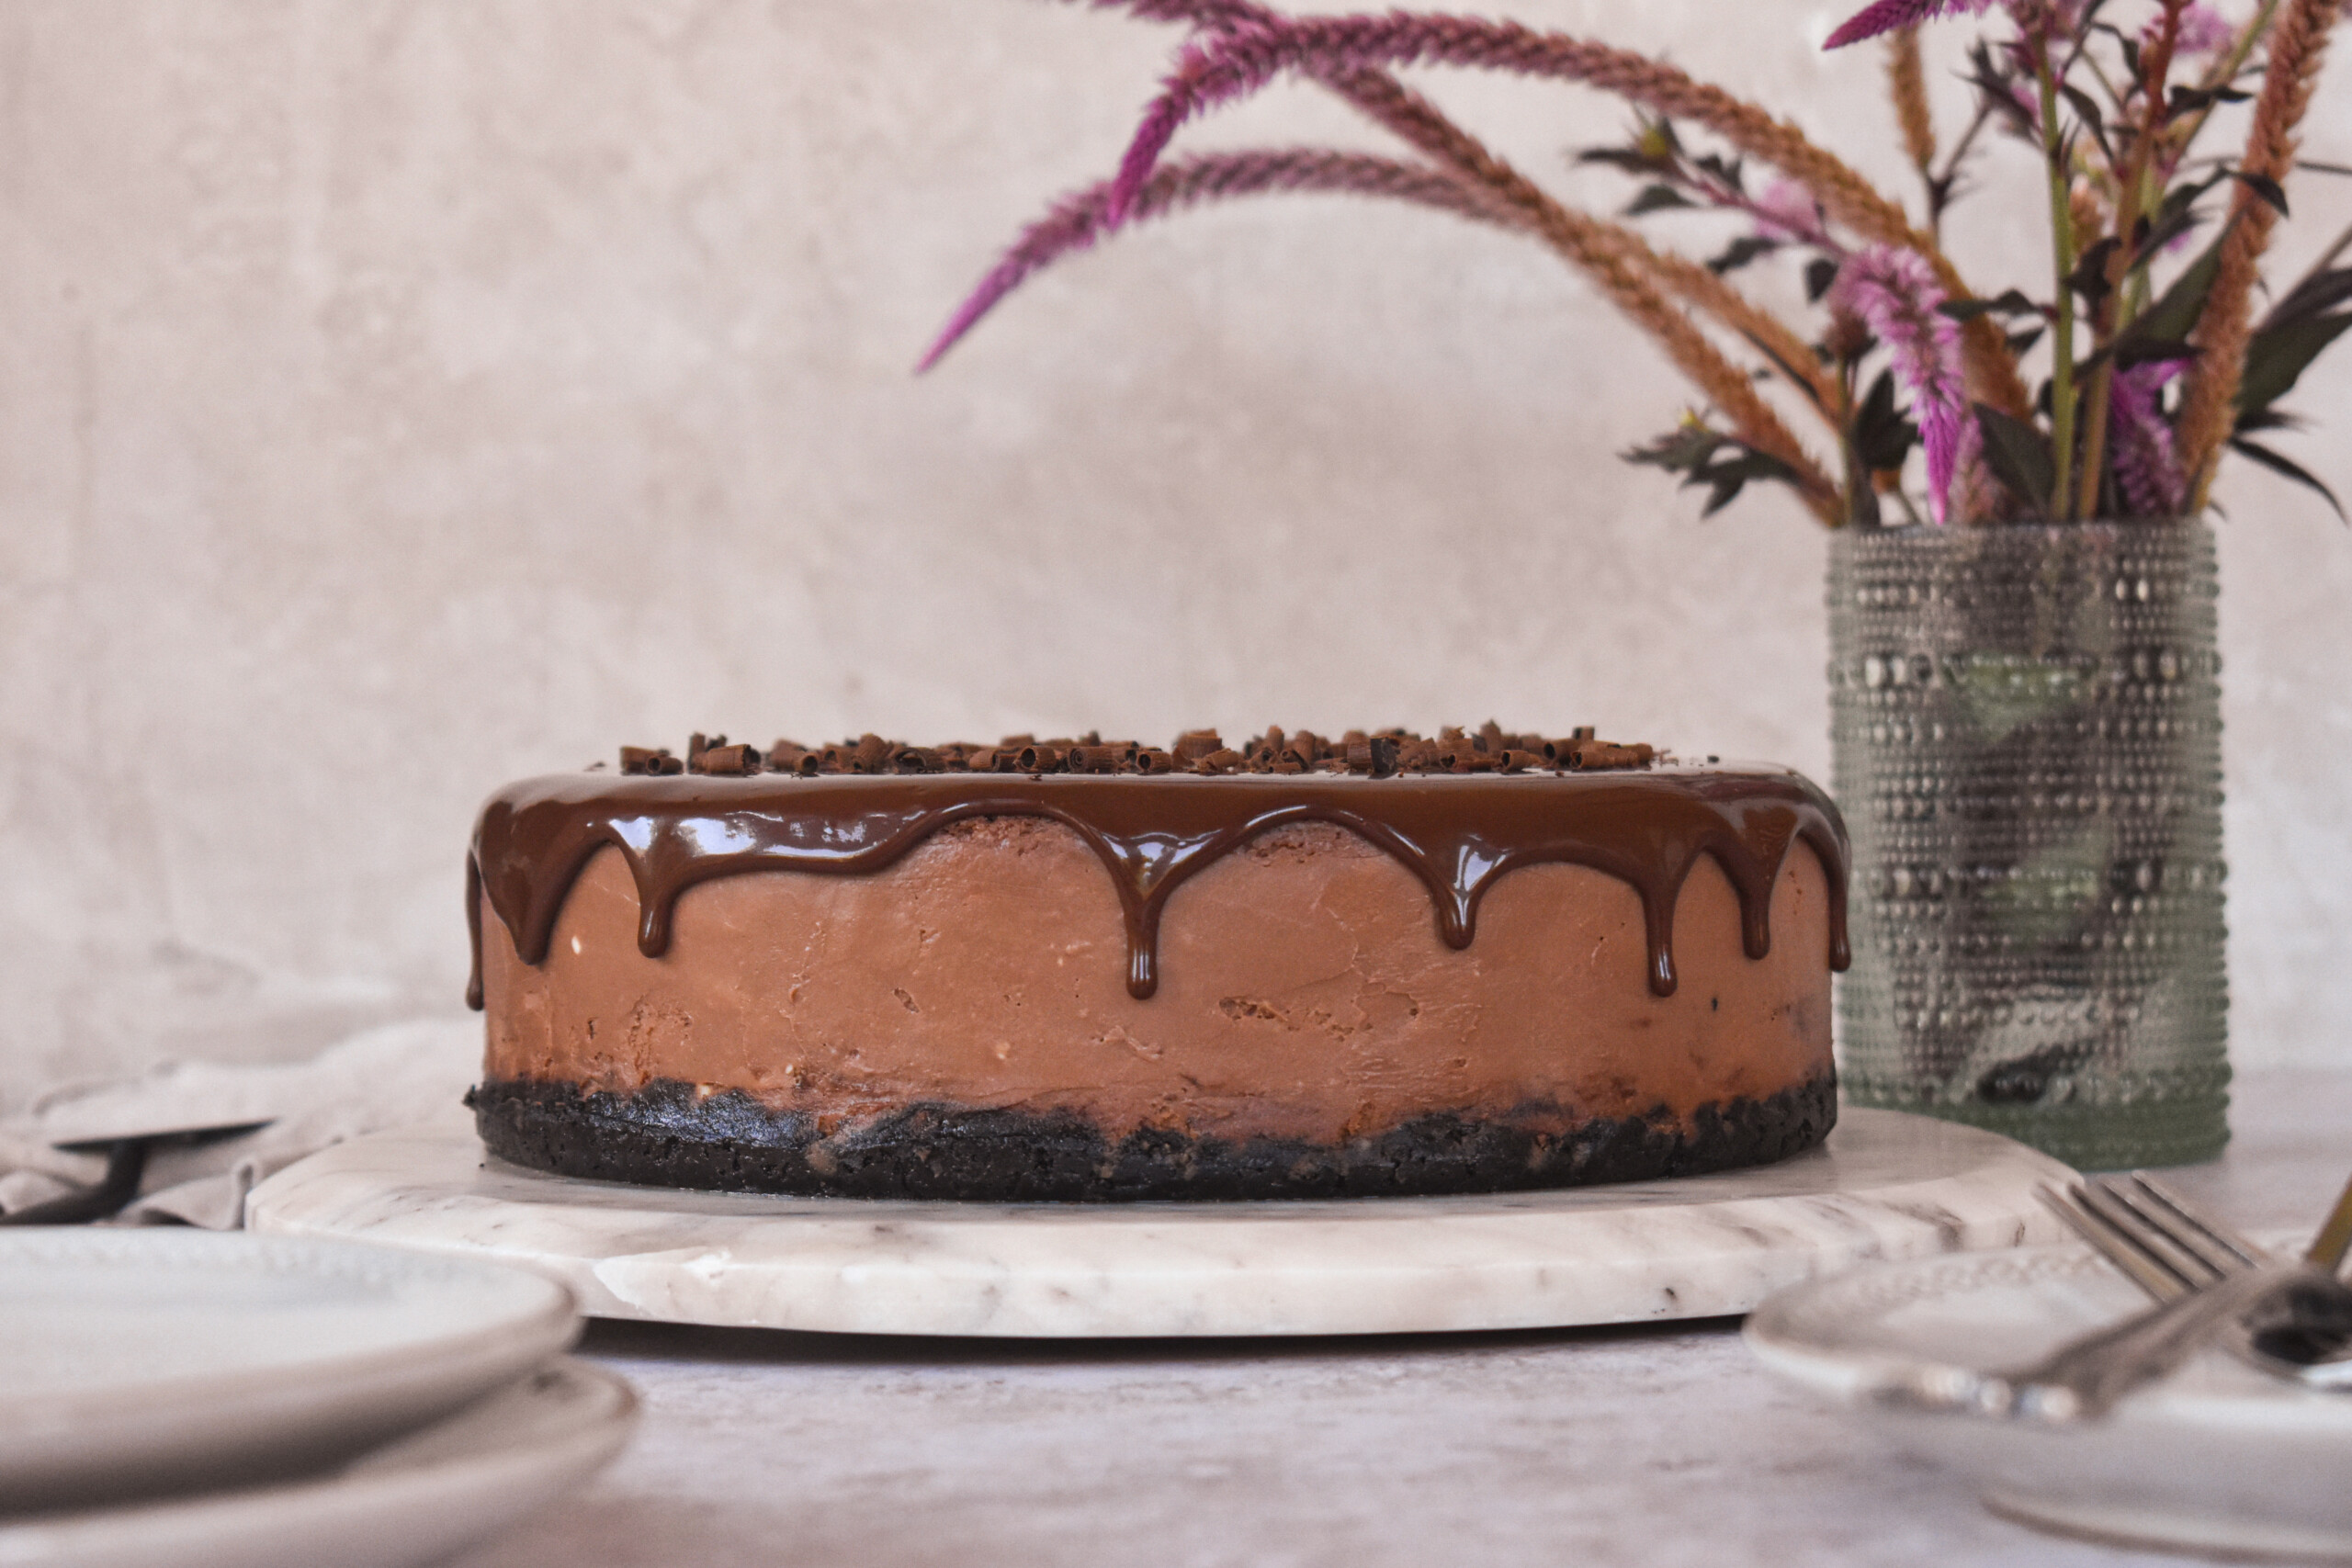
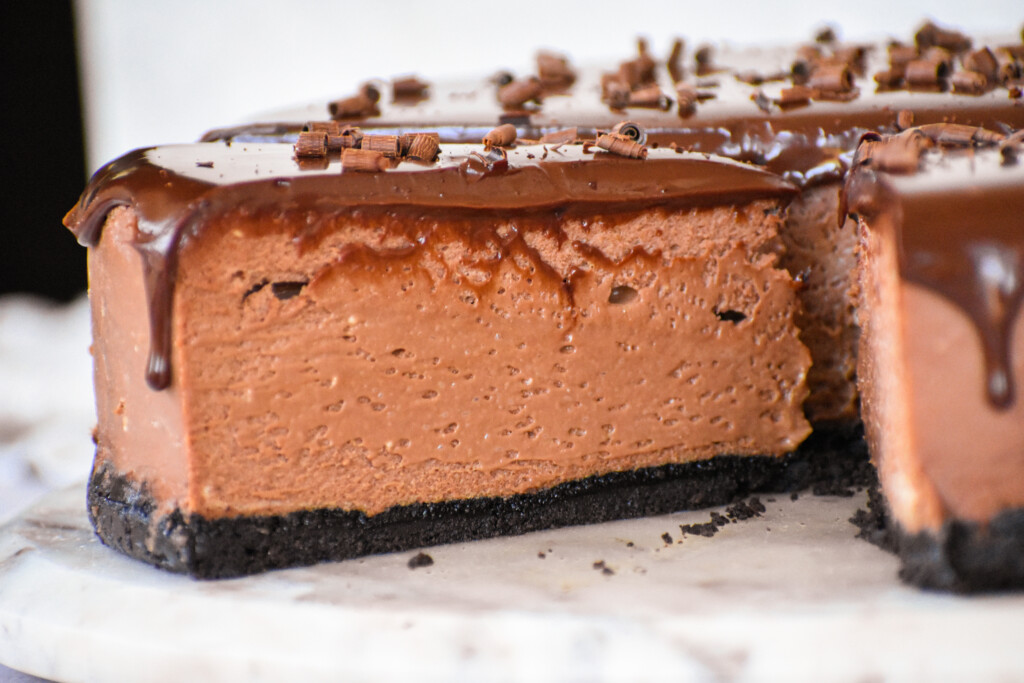
This cheesecake is everything. The Oreo crust is the perfect amount of bitter and sweet and creates the best base for this cheesecake. Then you have the cheesecake. It’s just slightly undercooked to give it a mousse like texture. It’s the silkiest most luxurious texture with the best balance of chocolate flavor. I wanted it to be milk without it being too sweet but I also didn’t want it to be bitter. Thankfully, I believe I achieved it. Silky, chocolatey and rich but not bitter or dense. If I still haven’t sold you, just take a look.
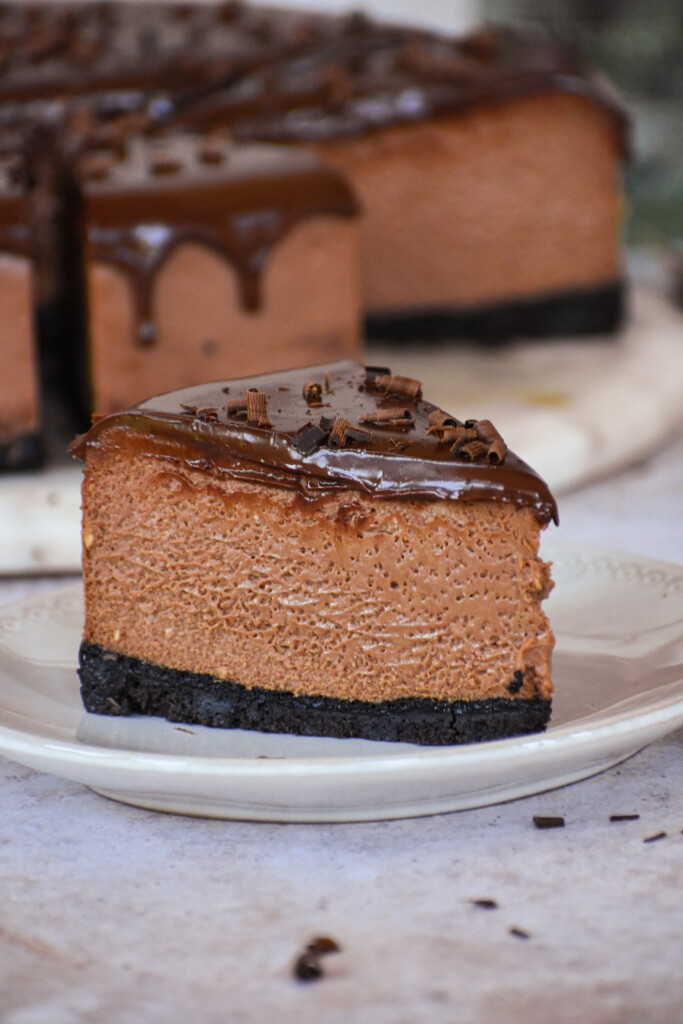
How to make a successful Cheesecake?
So let’s get to the good stuff now. In order to make a successful cheesecake you need to be a little more detail oriented and patient then with your typical baking. The batter itself is semi forgiving, but the baking and cooling process will make or break (quite literally) your cheesecake. Here are a few tips I have to ensure a successful and perfect cheesecake.
Take out your cream cheese a few hours in advance. It is essential that you use room temperature cream cheese. This will ensure that it can be fully creamed and incorporated. Especially since we’re adding chocolate, you need it to fully incorporate so you don’t end up with white lumps amongst your cheesecake. A room temperature cream cheese will also give you that silky smooth lump free texture which will also prevent your cheesecake from cracking. Trust me and use room temperature cream cheese. And whatever you do, DO NOT soften it in your microwave.
What kind of pan should I use?
Get a springform pan. Don’t bake it in a cake pan. It’s not deep enough and the sides don’t come off and you’ll ruin all your hard work trying to get it out of the pan. Or you’ll mangle it as your serve it out of your cake pan. The sides of a springform pan clip off and makes it effortless to get your stunning cheesecake out. So not only will it be delicious, it’ll be a showstopper too. Here’s a link to the one I love. I’ve had it for years, and it hasn’t failed me yet! Now wrap that pan in foil, twice. Keep the shiny side out and wrap it nice and snug. Set it aside. I like to do this before putting the crust in.
Use a parchment round in the bottom of the pan. This way, not only do the sides come off, but you can also take the bottom of the pan off. The crust won’t stick and you can give it one hell of a presentation. You can buy them here, or just cut your own. It’s very fast and the effort is worth it. Plus it will keep you from scraping the crap out of the new springform pan I just got you to buy 😉.
What ingredients I prefer
Cream the cream cheese and scrape the bowl multiple times. You want it silky smooth. Scrape the paddle and the bowl three times and cream it well. Make sure to scrape the bowl after each ingredient addition too. Also, try not to beat it on the highest setting because we don’t want to introduce air into the batter either.
Use good quality chocolate. Don’t use chocolate chips. I used a combination of Lindt Milk Chocolate Bar and Ghirardelli Semi Sweet Chocolate Bar. This gave me the perfect balance of chocolate but not too sweet or bitter. Melt it slowly and let it cool before adding to the batter. If you add it piping hot to the batter, the second it touches the cheese mixture it’ll start to solidify and you’ll get unpleasant chunks.
I used Oreo thins because of the lack of filling in them. Regular Oreos have too much filling and will make the crust super greasy. Use Oreo thins, crush them really well and mix in with the melted butter. Pack it really tight. And unlike most recipes, no need to bake the crust separately first.
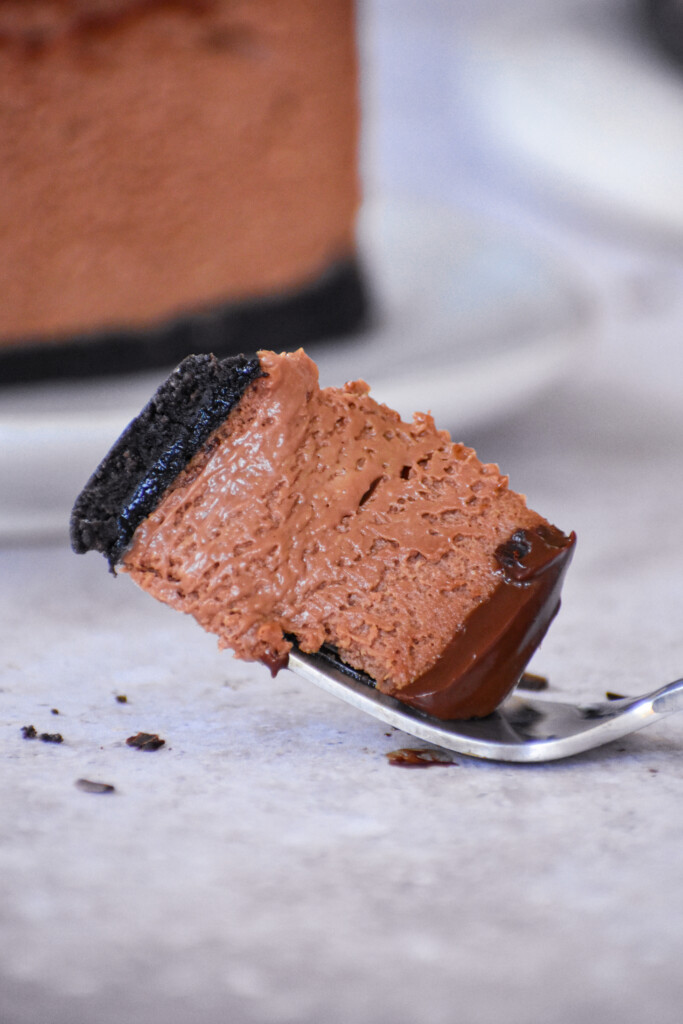
Baking a perfect cheesecake
Once you add your batter to the springform pan, you’ll think its gonna overflow. If you got the pan I told you too, it won’t. Trust me and go with it. Lift the pan and bang it a couple times to get out any air bubbles. This will keep it from cracking.
Now for the baking. A couple steps you need to know. Put your rack one lower than the dead center. Place another rack above it but high enough where it won’t touch the cheesecake. Grab a piece of foil, and shiny side down place it on the upper rack. This way it keeps the oven from scorching your cheesecake without it ever touching it. Now, preheat your oven while you prep the cheesecake. You want it to be evenly hot and running for awhile. And while you’re at it get a kettle of water boiling and grab a 9×13 cake pan and set it aside. Preferably not glass. You could also use any roasting pan or round cake pan.
Your oven is hot. The water is boiled. The cheesecake is ready in its pan. Now, open the oven. Put the roasting pan or pan of choice all the way at the bottom of the oven. Pour the boiling water into it. Place your cheesecake on the middle lower rack you had ready. It’s not going to bake in the water bath but above it. If you have an older oven just place a third rack below the one the cheesecake is going to be on. Close the oven immediately and set a timer for 60 minutes. Do NOT open the oven. Watch it from the outside and once the timer is up you can check it to see if it’s cooked or if it needs more time.
It’s been an hour of patiently waiting for the cheesecake to finish. Now open the oven and watch it jiggle. It needs to jiggle like set jello but the sides need to be firm and not wet to the touch. Firm like a sponge cake not a dense banana bread. If it’s still not at that point bake for 15 more minutes. Once it’s done baking, turn OFF the oven and crack the door slightly. Set a timer for 30 minutes. You’re going to let it cool in the cooling oven for thirty minutes. The oven is off and the door is cracked. After thirty minutes set it on the counter and let it cool till it’s just slightly warm, about an hour. Then take the foil off the pan, grab a paper towel and let’s wrap it up. Place the paper towel on the top of the cheesecake so it doesn’t condensate as it cools and then wrap it with the foil. It will already be the perfect shape. See? I’m making it too easy for you. Refrigerate it for at least 6 hours or ideally overnight. You’ve gone through all this work to make the perfect chocolate mousse cheesecake, trust me and wait it out.
Cooling and cutting a cheesecake into clean slices
Phew. It’s finally done. Now make the ganache, and trust my chocolate choices. While it sits for a couple minutes, let’s un mold the chocolate cheesecake. Get a plate ready and a firm but light cutting board. Grab a knife and soak it in boiling water. Dry it off and run it around the rim of the pan, and then unlatch the pan. Remove the siding, admire your piece of work of a second and then lets remove the bottom. Now, if you’re not confident you can do this, don’t. You can just place it on a serving plate with the bottom still attached. But I’m a daredevil. Place your handy paper towel on the top of the cheesecake and then place your firm cutting board on top of that. If you listened to me and let it cool it’ll be strong enough to handle this. Flip it in one swift movement. Using your sharp knife loosen the bottom of the pan and peel back the parchment. Now gently place your serving plate on top of your cheesecake crust (it’s upside down now), and flip once again. It’ll be right side up, on the right serving plate, and almost ready to serve. Pour the ganache into the center and let it drip down the sides. Refrigerate for a few minutes so it can harden a little. And now, it’s finally ready.
Stand back. Admire your chocolate mousse cheesecake in all its glory. Pat yourself on the back. Now let’s slice and enjoy.
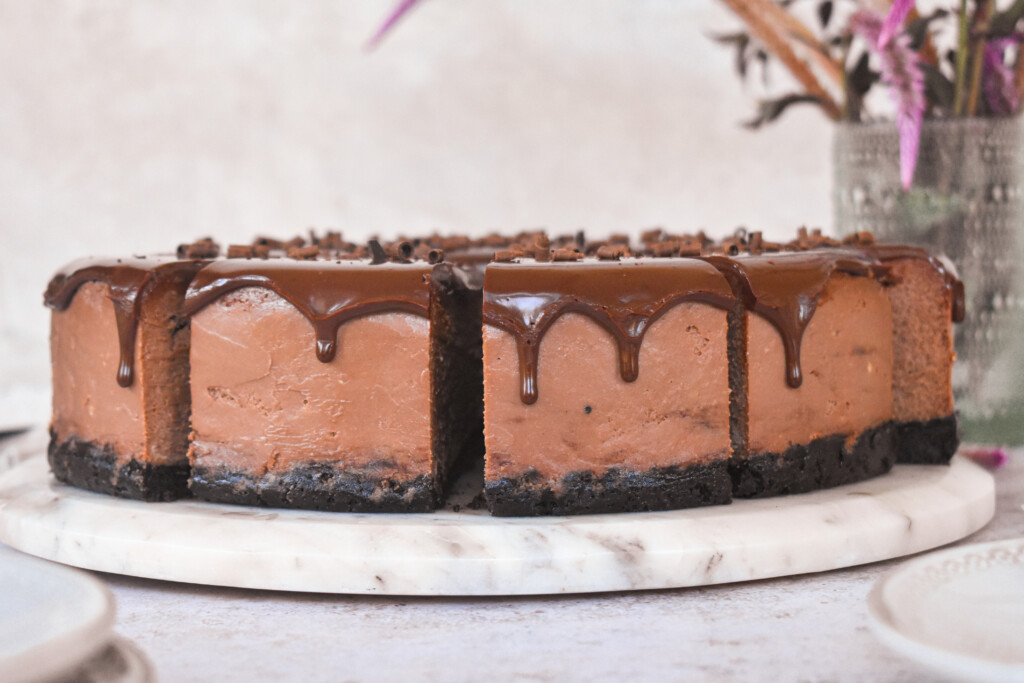
Get your boiling water and a big knife ready. I like to score the top of the cheesecake first so I know were to cut. Mark it all up, dip your knife in boiling water, dry it off and make one swift cut. Repeat the water and drying for each cut. You’ll get perfect pieces each time. You didn’t go through all this just to destroy it cutting it. It’s gotta be stunning on the plates too. Enjoy every bite of this beauty. Oreo crust, silky smooth rich chocolate mousse cheesecake batter and a perfect rich ganache. This cheesecake is perfection, and by now you should be able to perfect making it.
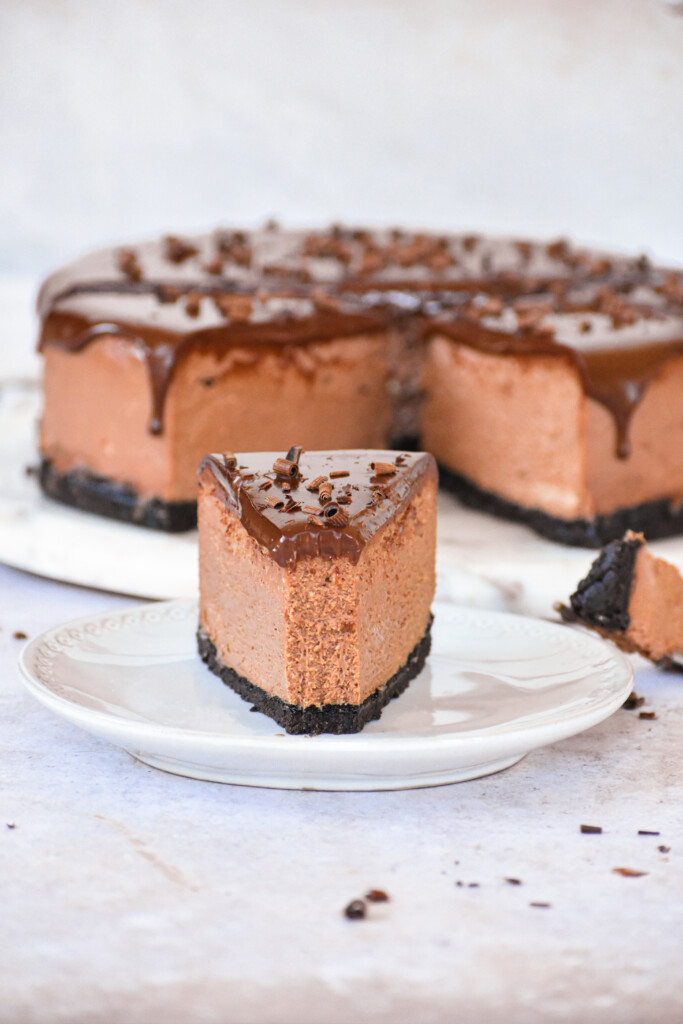
Chocolate Mousse Cheesecake
A crushed Oreo crust filled with a silky luxurious chocolate mousse cheesecake and topped with a rich chocolate ganache. This cheesecake is any chocolate lovers dream.
- Prep Time: 40 minutes
- Cook Time: 1 hour
- Total Time: 8 hours
Ingredients
CRUST
40 oreo thins
5 tbsp melted butter
Cheesecake:
2 lbs Cream Cheese, room temperature
1 1/4 Cup Sugar
1/2 tsp Salt
7 oz Sour Cream
1 tbsp Vanilla Extract
4 Eggs
4 ounces semi sweet chocolate
4 ounces milk chocolate
Ganache Topping
3/4 cup Heavy Cream
3 oz dark chocolate
3 oz milk chocolate
Instructions
Start by making the crust. Crush the Oreos and mix with the butter. Set aside.
Preheat the oven to 325 F. Prepare a 9 inch Springform Pan. Wrap the pan with foil twice, with the shiny side out. Place a parchment round in the bottom.
Pour the crust into the pan and pack it down tightly with a flat bottom cup.
Beat the cream cheese until smooth and creamy. Scrape the bowl and make sure there are no lumps. Add the sugar and beat for a few more minutes. Scrape again.
Add the salt, vanilla, and sour cream. Beat again. Scrape again.
Add the eggs one at a time, beating after each addition until its fully incorporated.
Scrape down the bowl. Add the melted and cooled chocolate and mix until evenly incorporated.
Scrape the bowl and pour your batter over the tightly packed crust. Lift the pan slightly off the counter and drop it. Do this a few times to get out any air bubbles in the batter.
Place a roasting pan or 9×13 cake pan into the bottom of your preheated oven. Fill it 3/4 of the way with boiling water. Place the prepared cheesecake on a rack above it and bake for 1 hour without opening the oven. After one hour check your cheesecake. If the side are firm and the whole cheesecake jiggles like JellO then it’s ready. If not, bake for another 15 minutes, but no more.
After your cheesecake is fully baked, turn OFF the oven and open it slightly. Leave the cheesecake in the turned off oven for 30 minutes. It will cool slowly with the oven. If it rose, it will shrink down.
After thirty minutes place your cheesecake on the counter or on a wire rack. Let it cool completely for about an hour.
After one hour, run a knife around the edges to loosen the sides so it doesn’t stick and crack as it cools. DO NOT open the pan yet. Remove the foil and place a paper towel on the surface of the cheesecake to absorb any moisture. Cover it with the existing foil. Refrigerate for at least 6 hours, or overnight. Don’t cut corners here, or it will fall apart and not be set.
When you’re ready, prepare your ganache. Boil the heavy cream. Pour onto the chopped chocolate. Cover with plastic wrap and let it sit for five minutes. Mix until smooth. Set aside while you un mold the cheesecake
Remove the sides of the springform pan. You can serve it on the bottom or you can gently loosen up the parchment from the pan and place it on a serving dish.
Top with your ganache and refrigerate for ten minutes so it can set.
Boil some water and dip your knife in the boiling water. Dry the knife and then slice the cheesecake. Repeat for every slice so you’re using a clean hot knife each time. The slices will be perfect.
Enjoy


Marlene
Thank you for your time posting the recepie . Looks delicious
Nur
Thanks for being here!
Ala Ismail
Adding ingredients to my shopping cart haha can’t wait to try it!!
Nur
YAY! Let me know how it turns out please!
Raya Kashu
The perfect cheesecake recipe!! The instructions are so easy to follow!
Thank you for the recipe!!
Nur
Thanks for being here!
Jana Ahmad
This cake was unbelievable. It was the perfect consistency and not too heavy.
Nur
❤️❤️
Alex
Used this recipe for a potluck at work and everyone absolutely loved it including me! I used cinnamon sugar Graham crackers instead of the gingersnaps (not a huge fan of those) but followed the rest of the recipe completely. I will continue to make this for future fall gatherings and will add it to my recipe book! It did end up yielding a little more than what would fit in my 9” springform pan but I had some new ramekins to break in so I made the full sized cheesecake as well as 4 mini cheesecakes 🙂
Nur
That sounds amazing! I’m so glad you loved it. Yes, depending on the depth of your pan you may have leftover batter. My favorite cheesecake pan is perfect, but I have another pan that can’t handle all the batter. But mini cheesecakes any day! I wouldn’t be mad!
Kimberly
Made this for my mother in law’s birthday.
Omg.
Do yourself a favor..
Don’t walk –
RUN to the store..
RIGHT NOW.
The instructions & TikTok made this soo easy to make.
It looked professionally made.
And tasted well… basically – if perfection had a taste, it’d be this cheesecake.
Husband somehow managed to smuggle a piece home. I resisted eating it since he done did the dirty work.
But ..
After a few hours passed..
I found myself singing REO Speedwagon “Can’t fight this feeling” as I rescued the slice from the fridge and rehomed it to my belly.
A million out of ten would recommend.
Nur
Winnnnning for the best review ever. If I read this, I would run and make it. Thanks for being here. I’m so glad you enjoyed it so much and I hope you’ll try some more of my recipes!❤️❤️❤️
p.s I hope you enjoyed every last bite of that smuggled cheesecake
Kimberly
Hahaha. Aww. I am SO appreciative of you sharing this recipe!
I will be making it again SOON.
Was just at the store getting the ingredients 🙂
Nur
I’m so glad you love it as much as I do. Thanks for trusting me.
Armita
So delicious loved it you guys should really make it and try it because it’s worth it don’t miss out.
Nur
My all time favorite cheesecake. Glad you enjoyed it. Thanks for being here!
Tara Lockwood
Wow!!! There are no words to describe your decadent cheesecake recipes. This is my third one, and each cheesecake gets more sinful.
Nur
This makes me so happy. I have a really fun one in the works! So excited for you to try it next.
Lilly
Hi! I only have an 8 inch cheesecake pan, how much of each ingredient do I add for an 8 inch?
Nur
Make the regular amount and just put some in a smaller pan. It’s easier than scaling it down.
Debbie Lee
Getting Ready to make this cholocate mousse cheesecake for my husbands birthday. Am a bit unclear on how to wrap the pan in foil ? just the outside of the pan or inside and bottom ? and also use parchment round on bottom ?
Nur
Wrap the outside of the pan with foil and the parchment round goes inside. Watch this!
https://www.instagram.com/reel/Cwaqb7BoDDs/?igsh=MWZiZnUycThucTgzdA==
Debbie Lee
Excellent, Thx so much for clarifying 🙂
pat
Are you using the cream in the oreos or just the cookies?
Nur
I use the entire cookie with the cream.
Pat
The last question i asked was deleted because someone had already asked. I am hoping this one will get an answer.
You instruct us to add the melted and cooled chocolate. When I have melted chocalate, it hardens when it cools. Can you explain this further.
Nur
Let it cool slightly. And if your cream cheese is room temp it shouldn’t harden!